
-
Add a physical button to Sonoff basic in ESP Easy
Time: Mar. 18, 2020Before, you may have understood how to update the Sonoff WiFi Relay firmware for use under a Jeedom or Eedomus home automation box. Now let us know more about how you can also use the module relay with a physical button.
Of course, you can always manage the relay through the home automation system. You can also easily activate the relay manually with a simple switch.
You can imagine the possibilities available to you with such an addition. One can necessarily imagine a network lighting control with home automation or manual activation. Therefore, the Sonoff module can be easily integrated behind a switch with a sock installation box. In fact, the size of the module requires the use of this recessed box to mount the Sonoff on the wall.
So let's get to the heart of the matter, how do we do that?
Tracking
At first, it is advisable to identify the wiring to be used. Our switch connects to the two PIN codes below. Remember that in the Sonoff Flash guide we mentioned the case of the fifth PIN, which is useless for Flash but is probably useful for the rest ... The rest is now and will actually be useful!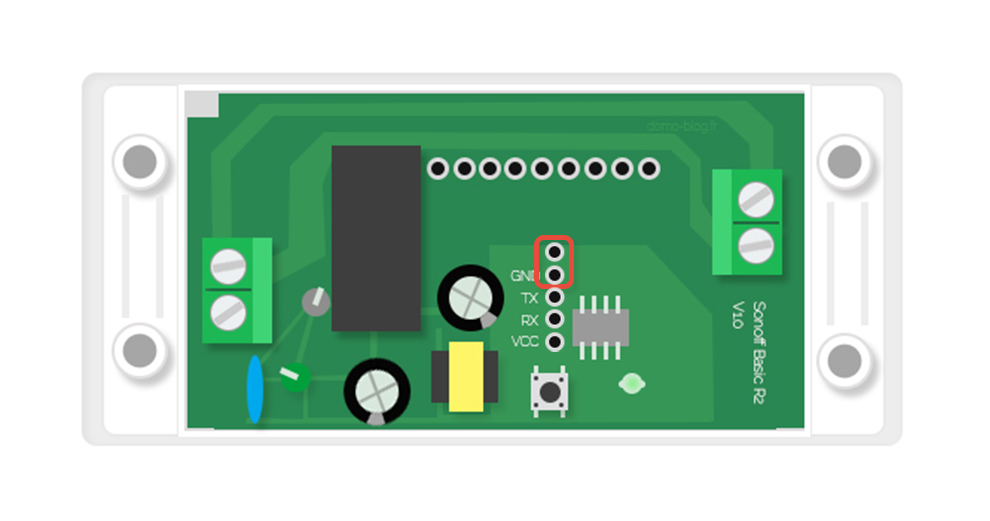
Switch wiring on Sonoff
As shown in the figure above, the switch is connected via two electronic test leads. There is no current in these cables and therefore depends on the switch. Therefore, you can easily use these little cables to connect the switch. If an end is provided for connection with an electronic PIN code, the Sonoff cable remains securely in place without soldering. For the other end, you need to cut and strip the wire to connect it to your switch. There should be a button for the switch.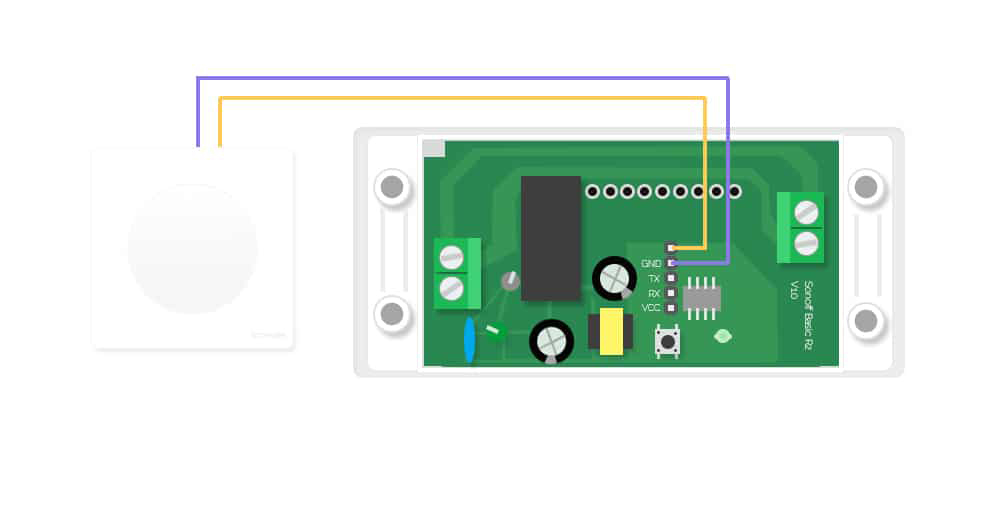
Sonoff configuration through the web interface:
1. Log in to the Sonoff web interface and go to the Tools tab.
2. In the system area, click Advanced
3. Now activate the rules simply by checking the Rules box.
4. Then save these new settings.
5. Now go to the Devices tab.
6. Verify that it has a configuration similar to the following. Keep in mind the syntax of the devices, it is important for the rest. Then change the button device.
7. Set the GPIO field with GPIO14, then the other fields as follows.
8. Save these settings with the Submit button.
9. Now go to the Rules tab.
10. Copy / paste the following code into the field and save it with the Submit button.Jeedom home automation box setup
1. Activate the display of the Change command on the Jeedom page and save.2. You now have the relay status indicator on the tile. The code we enter in Sonoff allows us to act on the relay at the touch of a button. Since we are testing both conditions, the relay turns on and vice versa when the relay turns off and you press the button. The status of the relay is updated accordingly on the mosaic side.
3. Then it has a Sonoff module that can be activated by both a switch and the home automation system. If the status is increased, you can simply turn it on and off using the button or from Jeedom or vice versa.
The Eedomus home automation box page setup
1. First create a new virtual state through the box configuration interface.
2. Configure this state as follows and write down the API code that we will use later.
3. In the Value tab, configure the following values
4. To update this new status, go back to the Sonoff configuration interface and IP address and access the Rules tab. Copy and paste the next code. Be sure to change the eedomus API codes according to your configuration.
5. Your Eedomus status will automatically update when you press the button.Do this way you have done everything.